

Materials: hand pliers, chicken wire, metal wire, and some sort of greenery (we used boxwood from our backyard but any kind of garland would do!).

1. Cut your chicken wire and lay out your shape. We did "H" for our last name but you could make any shape you like or even three letters for a monogram!

2. Twist each piece of chicken wire into a tube shape. This doesn't need to be perfect — just three-dimensional so you can secure your greenery to the wire.

3. Wrap your greenery around each part of the letter and secure with metal twist ties as needed.

5. Go back and trim as necessary.

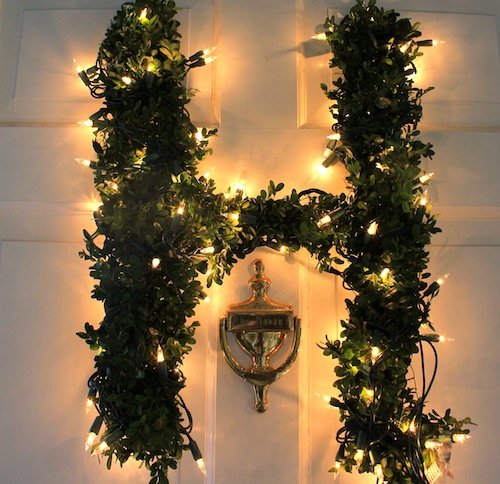
6. Ta da! You're almost finished. Now wrap with Christmas lights...

7. And hang on your front door! You'll be the envy of the neighborhood. ;)

What do you think?! Any fun holiday DIY projects you've tackled lately?
Keep up with Design Darling
27 comments:
Love it! What a great idea!
beautiful mackenzie!!!
LOVE the initial "wreath"! Leave it to you to find a way to monogram the front door :) I love that you chose to use fresh greenery. I would have been the one to run to Michael's and grab fake garland. I bet this DIY would be amazing with some live garland, and smell good too! Maybe I will try it for a door inside my place! Great idea.
So, so good- well done mom!
I love this idea! What a great DIY!
Very pretty! Do you know if for the Alt Summit we could buy just a ticket for the session that you will be in? :) I actually only live 3 hours away and would love to come down and learn from you!
it's awesome badawesome.
hope you'll stop by when you have a moment, lovely blogger.
smiles to you.
michele
http://hellolovelyinc.blogspot.com
Wow, yours looks great! Haha, not sure if I could tackle a tricky 'R'!
me likey!
love this!!!!!
One of the best DIY wreaths I've seen this season! How long does the Boxwood last and how do you get the lights on without having an ugly cord hanging from your front door?
I love it! How did you deal with the cord from the lights?
This is so cute, and looks so easy!
This is such a creative idea, I'll definitely have to try it! love it!
Savannah
http://glittersandfades.blogspot.com
This is really fantastic! I love the idea of doing this.
Chelsea
Haute Child in the City
Thanks everyone!
emdash and Jennifer — Wireless Christmas lights! They run on battery power. We found ours at Target!
Wow that looks great! Such a cool idea!
I love that! What a fun idea!
This looks GREAT!! What a fantastic idea for Christmas, even though I would want to have this up year-round!! :) So crafty, M!
I DEFINITELY need a boxwook 'K' in my life! Great tutorial, friend!
This is too cute!!!! Love the lights on it.
xoxo
Mandy
Saguaros & Stilettos
Mackenzie, this is genius! Pinning it, honey.
OMG i love this!!
Love this idea! Thanks for sharing! Must pin for future reference :)
xo Olivia
go for the glam
So adorable!! Love this...especially with it all lit up! Gorgeous!
What a great idea! A twist on a classic Christmas decoration- love it!
This is such a great idea! I may have to try this weekend!
Post a Comment